
Lists & Views
A list is a curated set of products — a buy sheet for one customer, a seasonal collection, a trade-show edit, a “reorder these” shortlist. Lists live in Lists & Views, open into the full catalogue with all its tools, remember how they should be presented, and feed straight into line sheets. You build a list once and reuse it everywhere.
The Lists home page
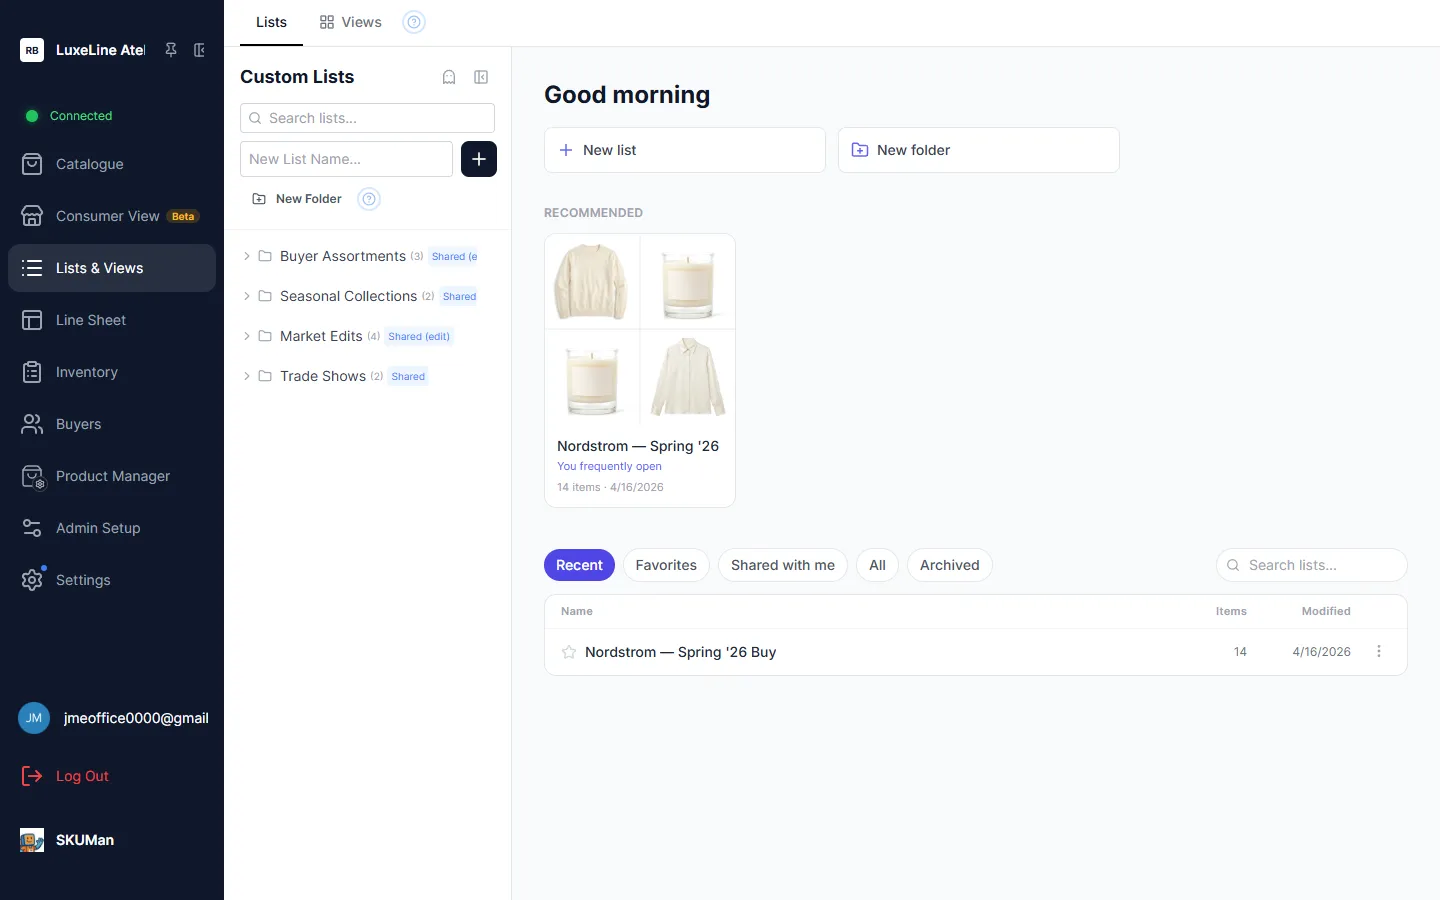
Section titled “The Lists home page”Opening Lists & Views lands on a home page that helps you get back to the right list fast:
-
Recommended — cards for the lists you open most often or opened most recently, one click away.
-
Tabs — filter the list grid by:
Tab Shows Recent Lists you opened most recently Favorites Lists you have starred Shared with me Lists other people gave you access to All Every list you can see Archived Lists you have archived out of your own view -
Search — type any part of a list’s name to find it across every tab.
-
Folder tree (the left panel — your sidebar) — this is where your folders and list rows live; folders group related lists (“Buyer Assortments”, “Trade Shows”, …) and a Favorites section pins your starred lists to the top. A folder shows a Shared badge when its contents are shared with the rest of your company.
Favorites and archiving
Section titled “Favorites and archiving”Two kinds of housekeeping are personal to you — they change only your own view and never touch what teammates see:
- Favorite — click the star on a list’s row on the home page to pin it to the Favorites tab and keep it near the top of your sidebar. (You can also drag a list onto the Favorites tab.)
- Archive — open a list’s ⋯ (more) menu on the home page and choose Archive to hide it from your sidebar and home page. It stays fully intact for everyone else, and you can bring it back any time from the Archived tab.
Archiving is not deleting: nobody else loses the list, and the list’s contents are untouched. (Deleting a list is separate — available to the list’s owner, admins, anyone granted full “edit & delete” access, and anyone who can edit the shared folder it lives in; deleted lists go to a recycle bin and can be restored by an admin for 30 days.)
Creating lists and folders
Section titled “Creating lists and folders”- New list — type a name into the New list box on the home page (or the equivalent box in the sidebar) and confirm. The empty list opens ready for products.
- New folder — use New folder and give it a name.
- Organize into folders — drag your own lists onto a folder in the tree to move them in. You can rearrange lists you own freely; lists that were only shared with you stay where their owner put them.
Adding products from the catalogue
Section titled “Adding products from the catalogue”Every product you add comes from the Catalogue. There are three ways to add, and none of them ever creates a duplicate — a product already on the list is silently skipped.
The + button on a card
Section titled “The + button on a card”Hover a product card in the catalogue and click its + button, then pick the list. This is the quickest way to add a single product, and — unlike drag-and-drop — it doesn’t require dragging.
The bulk actions bar
Section titled “The bulk actions bar”Select several products — Ctrl/Cmd-click to toggle individual cards, Shift-click to range-select, or drag a marquee across empty space — and a bulk actions bar appears. Use its Add to List action to drop the whole selection onto a list at once. Selecting a parent (style) card includes all of that style’s variants.
Drag and drop
Section titled “Drag and drop”You can also drag products directly onto a list:
- Drag one card onto a list to add that product.
- Drag your whole selection — start dragging any selected card and the entire selection travels with it.
- Drag a parent (style) card to add every variant of that style in one gesture.
- Drop targets — a list row in the sidebar, or the main product area of a list you already have open. Only lists you’re allowed to edit highlight as you drag over them; folders are not drop targets for products — you can file lists into a folder (see Organize into folders above), but you can’t drop products onto one.
- Across two browser windows — open the catalogue in one window and a list in another, and you can drag between them. This is handy on a second monitor while you build an assortment.
Drag-and-drop needs a mouse or trackpad; if you’re working from the keyboard, use the + button or the bulk actions bar’s Add to List instead.
What you see after adding
Section titled “What you see after adding”Whichever method you use, a confirmation tells you exactly what happened — how many products were added and how many were already on the list and therefore skipped. If everything you dropped was already there, you get a brief notice instead of a dialog. Your catalogue selection stays selected after a drop, so you can keep adding the same products to another list.
Removing products from a list
Section titled “Removing products from a list”Open the list, select the products you want to drop, and use the bulk actions bar to remove them from the list. Removing a product only takes it off this list — the product itself, and its place on any other list, is untouched. Any custom-field values you had entered for that product on this list are cleared at the same time, since they only ever belonged to this list.
Working inside a list
Section titled “Working inside a list”Opening a list shows its products in a full catalogue view — the same search, filters, sorting and grouping, card layouts, zoom, and product detail view you use everywhere else. Everything you know from the catalogue works here, scoped to just this list’s products.
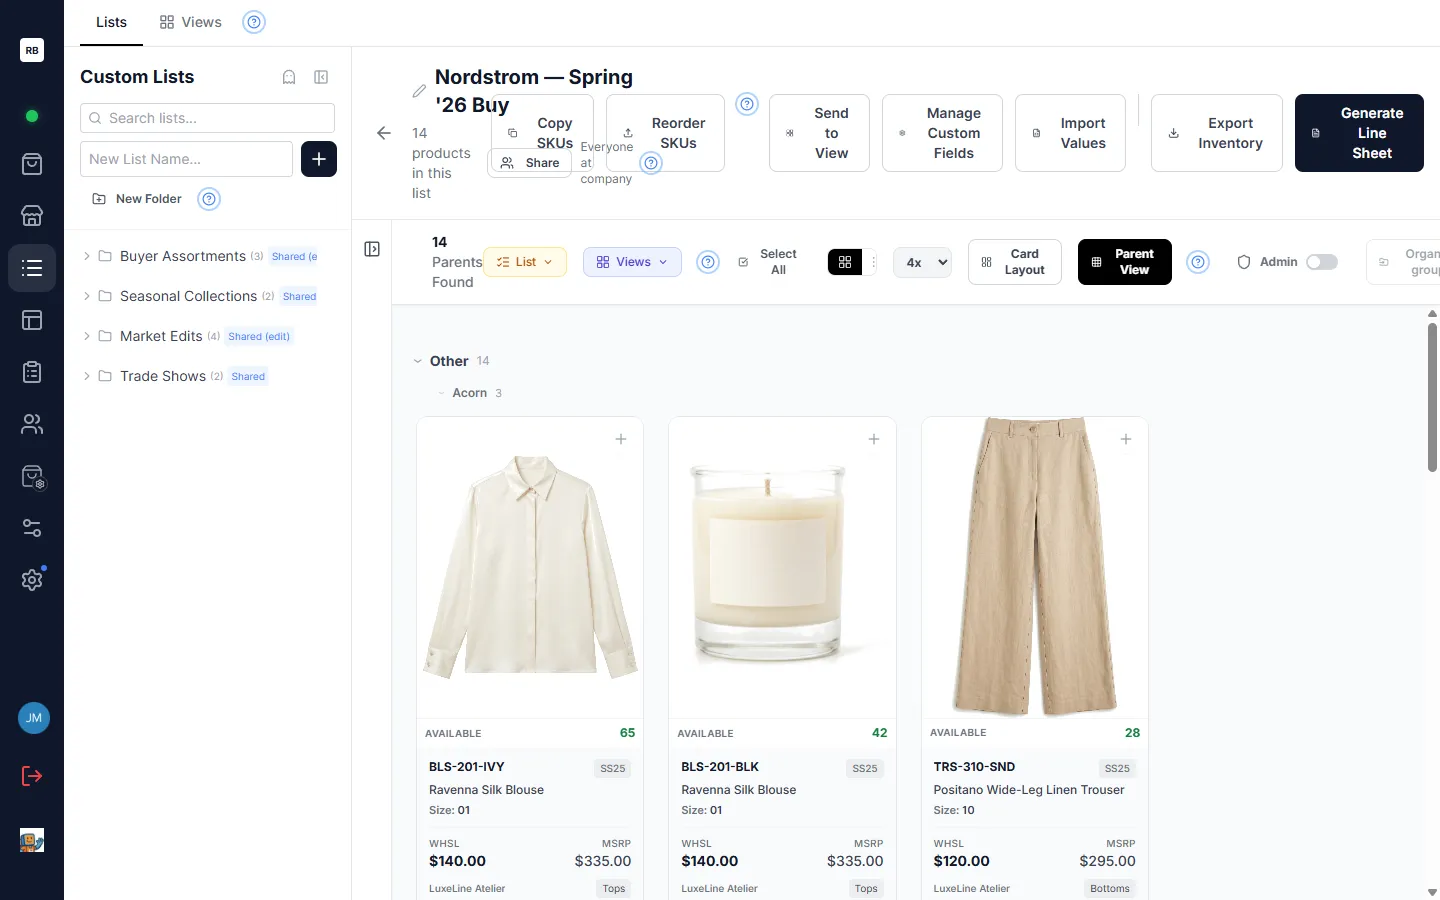
A list also remembers how it should look: an admin can set an organization default presentation (card layout, sort, grouping) for a list, and you can override it with a personal default. Either way the list opens looking the same every time, and your in-session tweaks don’t overwrite the default unless you save them.
At the right end of the list’s title row, one Actions menu holds everything specific to this list — Copy SKUs, Reorder SKUs (arrange presentation order by hand), Send to View, Manage Custom Fields / Import Values, Export Inventory, Generate Line Sheet and Build Presentation — and Share sits beside the list name. In short:
- Sharing lets the list’s owner grant teammates read, edit, or delete access, or open it to everyone at your company — see Sharing & List Tools for the full walkthrough of every toolbar action.
- Custom fields let you attach up to 50 fields that exist only on this list (order quantities, notes, ratings, delivery dates) — see Custom Fields.
- Export Inventory opens Excel Studio with this list loaded, where you design the spreadsheet — columns, grouping, totals, order-form quantity columns, cover sheet — and see a live preview before you download it. See Importing & Exporting.
- Generate Line Sheet jumps straight into the Line Sheet Builder with this list loaded, and Send to View hands the list’s products to a SKU View.